Mountain Pose
Tadasana
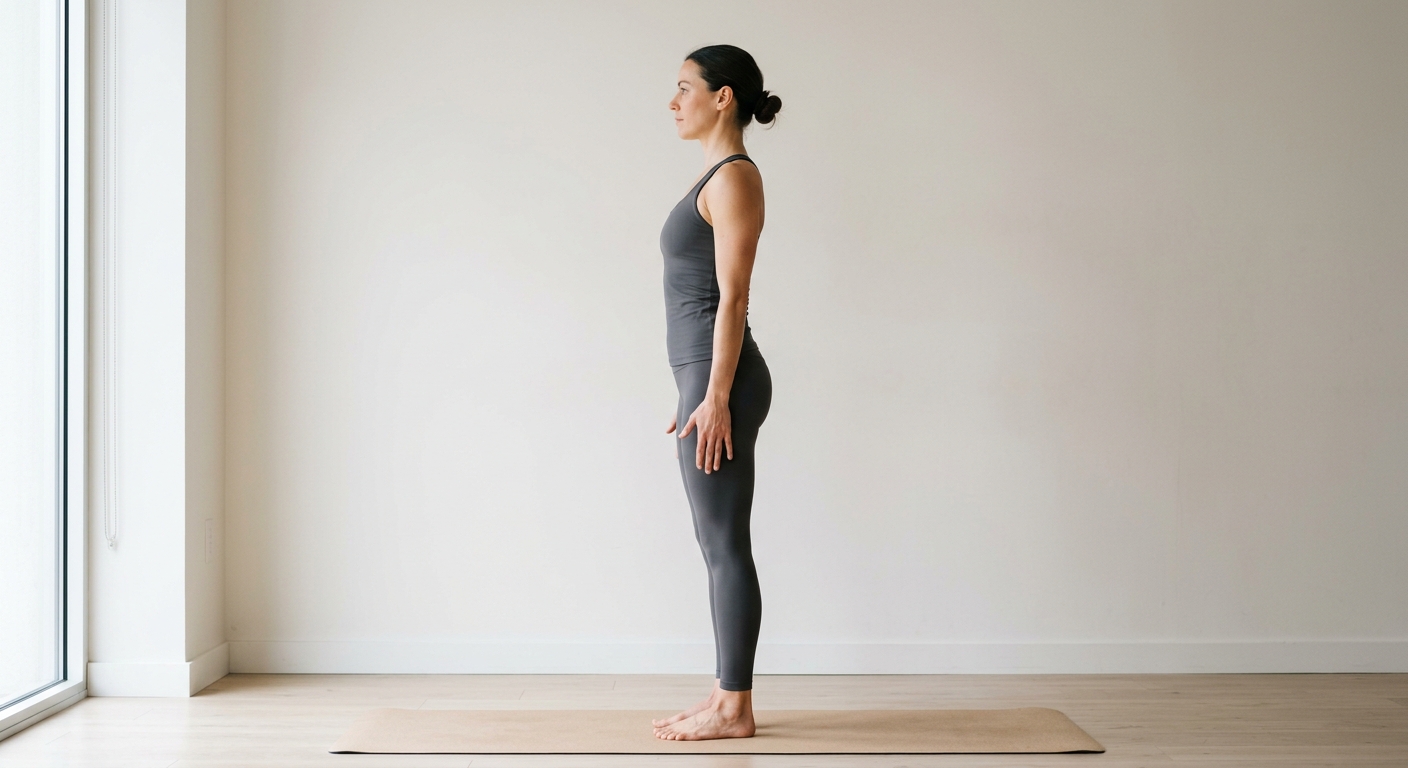
How to Practise It
- 1Stand at the front of your mat with your big toes touching and heels slightly apart, or place feet hip-width apart if that feels more stable for your lower back.
- 2Lift all ten toes, spread them wide, and place them back down to ground firmly through the four corners of both feet.
- 3Engage your quadriceps and lift your kneecaps without snapping or locking your knees backward.
- 4Level your pelvis by gently drawing the navel toward the spine and allowing the tailbone to lengthen naturally toward the floor.
- 5Broaden across your collarbones, rolling the shoulders back and down to let your shoulder blades rest flat against your upper back.
- 6Turn your palms forward or toward your thighs, extend your fingers gently toward the earth, and align your ears directly over your shoulders with your gaze steady at eye level.
Mountain Pose (Tadasana) is the foundational standing posture in yoga that establishes neutral alignment, balance, and whole-body awareness. In this posture, the practitioner stands tall with feet grounded, spine lengthened, chest open, and weight distributed evenly across both feet, serving as the blueprint for nearly every other standing posture in yoga.
Why Tadasana Is Far More Than "Just Standing There"
Whenever a new student joins my live morning classes, one of the first things I watch during our warm-up is how they stand. Most people approach Mountain Pose as passive rest between poses. They lock their knees backward, let their lower belly spill forward, slump their shoulders, and collapse into the inner arches of their feet.
In my experience, Tadasana is one of the most active poses in the entire practice. When done with deliberate engagement, you are recruiting almost every muscle group in your body to create an effortless-looking pillar of strength. The word Tada means mountain in Sanskrit. A mountain is immovable, grounded, and balanced despite wind and weather. That is exactly what we are creating in your physical frame.
Finding the Four Corners of Your Feet
I always cue Tadasana from the earth up. Before you worry about your shoulders or your chin, look down at your feet. In class, I ask students to lift all ten toes off the mat, spread them wide, and then grip the mat lightly as they lower the toes back down one by one.
Distribute your weight evenly across the four corners of each foot: 1. The base of the big toe 2. The base of the little toe 3. The inner heel 4. The outer heel
When you press down through these four points, you will immediately feel the arches of your feet lift and your inner ankles fire up. This upward rebound of energy travels straight into your shins and calves.
The Pelvis and Spine: Fixing the Habitual Tilts
Once your base is steady, we address the pelvis. Most of us carry postural habits from sitting at desks or carrying bags. Some students stand with an anterior pelvic tilt (arching the lower back and sticking the belly out), while others tuck the tailbone too aggressively and flatten the natural lumbar curve.
Here is the cue I give on screen: imagine your pelvis is a bowl of water. You want to level the bowl so not a single drop spills out of the front or the back. To achieve this, draw your lower abdominal wall slightly in and up, as if zipping up a snug pair of trousers. At the same time, gently release your tailbone toward your heels without clenching your glutes.
From this stable pelvis, let your spine grow tall. Soften your floating ribs inward so your ribcage rests directly over your hips, rather than jutting forward.
Shoulders, Neck, and the Micro-Adjustments
Next comes the upper body. Roll your shoulders up toward your ears on an inhale, and on the exhale, let the shoulder blades glide down and flatten against your back ribs. Keep your arms alongside your torso with your palms turned slightly forward or facing the thighs. Do not stiffen your fingers like wooden boards; keep them soft yet energized.
Finally, check your chin. In our screen-heavy daily lives, the head tends to jut forward. Draw the chin back just a few millimeters so your ears sit directly above your shoulders. Imagine a thread attached to the crown of your head pulling you upward toward the ceiling, creating space between every single vertebra.
How to Work with the Breath in Tadasana
Once you have found your alignment, do not freeze into a rigid statue. A mountain is strong, but it also breathes.
I guide my students through steady, equal-ratio breathing (Sama Vritti). Inhale through your nose for a slow count of 4, feeling your collarbones and ribcage expand three-dimensionally. Exhale through your nose for a count of 4, feeling your feet root even deeper into the floor while maintaining all the height you just created. Hold this active stillness for 5 to 10 full breath cycles.
If you experience sharp pain anywhere—especially in the lower back or knees—soften the posture immediately. If you have chronic joint issues, work with a gentle micro-bend in the knees and consider consulting a healthcare professional.
Practising Tadasana regularly changes how you stand in the kitchen, how you walk down the street, and how you carry yourself through stressful moments. If you would like me to look at your alignment in real time and help you refine your foundation, join me on the mat in our live online classes this week.
Benefits
- • Improves everyday posture and spinal alignment by strengthening postural stabilizers
- • Strengthens the arches of the feet, ankles, calves, and quadriceps
- • Firms the abdominal wall and stabilizes the pelvis
- • Develops proprioception, physical balance, and full-body spatial awareness
- • Calms the nervous system by promoting grounded, steady diaphragmatic breathing
Modifications
- • Feet hip-width apart: Stand with feet directly under your hip bones instead of touching to give more space for the lower back and sacroiliac joints.
- • Wall support: Stand with your heels, buttocks, upper back, and back of the head lightly touching a flat wall to give your nervous system immediate tactile feedback on neutral alignment.
- • Block between thighs: Squeeze a yoga block between your upper thighs on the medium width to activate the adductors and learn how to prevent excessive lower-back arching.
Muscles Worked
When to Avoid or Modify
- • Severe dizziness, vertigo, or active lightheadedness (practise with back against a wall or seated)
- • Unmanaged low blood pressure (avoid holding prolonged static standing holds without movement)
- • Recent acute foot, ankle, or knee injuries that make weight-bearing painful
This is general guidance, not medical advice. If you have an existing injury or condition, check with your doctor before practising.